Deploying RethinkDB applications with Docker using Dokku
 Ryan Paul
Dokku is a simple application deployment system built on Docker. It gives you a Heroku-like PaaS environment on your own Linux system, enabling you to deploy your applications with git. Dokku automatically configures the proper application runtime environment, installs all of the necessary dependencies, and runs each application in its own isolated container. You can easily run Dokku on your own server or an inexpensive Linux VPS.
The RethinkDB Dokku plugin, created by Stuart Bentley, lets developers create containerized RethinkDB instances for their Dokku-deployed apps. I’ve found that Dokku is a really convenient way to share my RethinkDB demos while I’m prototyping without having to manually deploy and configure each one. In this short tutorial, I’ll show you how you can set up Dokku and install the plugin on a Digital Ocean droplet.
Set up a Digital Ocean droplet
If you want to set up Dokku somewhere other than Digital Ocean, you can use the Dokku project’s official install script to get it running on any conventional Ubuntu 14.04 system.
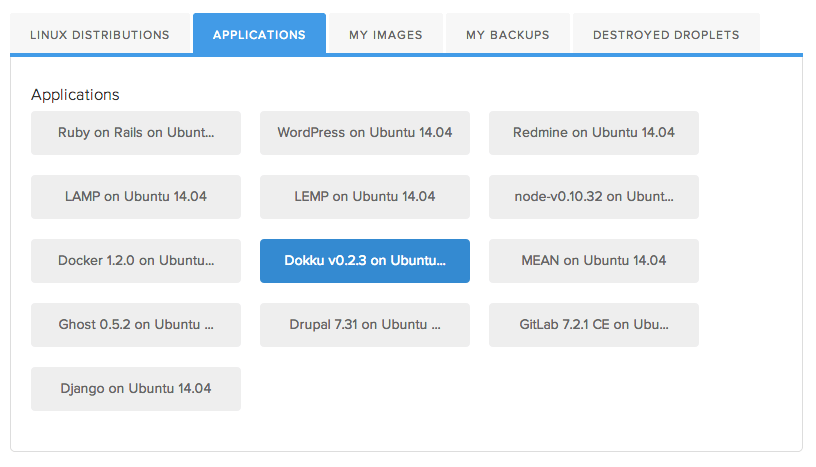
Digital Ocean provides a selection of base images that make it easy to create new droplets that come with specific applications or development stacks. Dokku is among the applications that Digital Ocean supports out of the box. When you create a new droplet, simply select the Dokku image from the Applications tab.
You can configure the droplet with the size, region, and hostname of your choice. Be sure to add an SSH key—it will be used later to identify you when you deploy to the system.
After Digital Ocean finishes creating the new droplet, navigate to the droplet’s IP address in your browser. The server will display a Dokku configuration panel. The page will prompt you for a public key and a hostname. The key that you selected during droplet creation will automatically appear in the public key field. In the hostname box, you can either put in a domain or the IP address of the droplet.
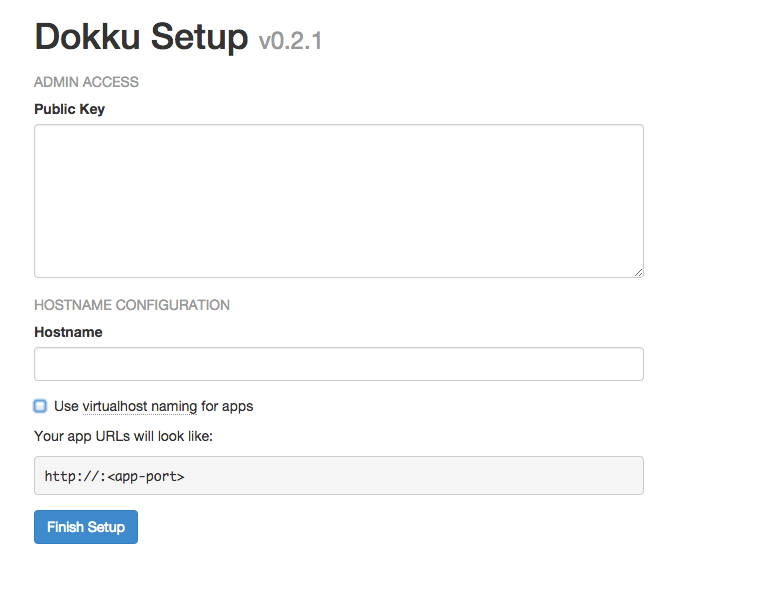
If you use an IP address, Dokku will simply assign a unique port to each of
your deployed applications. If you configure Dokku with a domain, it will
automatically create a virtual host configuration with a subdomain for each
application that you deploy. For example, if you set apps.mydomain.com as the
hostname, an app called demo1 will be available at demo1.apps.mydomain.com.
After you fill in the form, click the Finish Setup button to complete the Dokku
configuration.
If you chose to use a domain, you also have to set up corresponding DNS
records. In your DNS configuration system, add two A records—one for the
domain itself and a wildcard record for the subdomains. Both records should use
the IP address of your droplet.
A   apps.mydomain.com     xxx.xxx.xxx.xxx
A   *.apps.mydomain.com   xxx.xxx.xxx.xxx
Install the RethinkDB Dokku plugin
The next step is installing the plugin. Use ssh to log into the droplet as
root. After logging into the system, navigate to the Dokku plugin folder:
$ cd /var/lib/dokku/plugins
Inside of the Dokku plugin folder, use the git clone command to obtain the
plugin repository and put it in a subdirectory called rethinkdb. When the
repository finishes downloading, use the dokku plugins-install command to
install the plugin.
$ git clone https://github.com/stuartpb/dokku-rethinkdb-plugin rethinkdb
$ dokku plugins-install
Configure your application for deployment
Before you deploy an application, you will need to use Dokku to set up a linked RethinkDB container. While you are logged into the droplet as root, use the following command to set up a new RethinkDB instance:
$ dokku rethinkdb:create myapp
You can replace myapp with the name that you want to use for your
application. When you deploy an application, Dokku will automatically link it
with the RethinkDB container that has the same name. Now that you have created
a RethinkDB container, it is time to deploy your first application.
Dokku supports a number of different programming languages and development
stacks. It uses certain files in the project root directory to determine what
dependencies to install and how to run the application. For a Ruby demo that I
built with Sinatra, all I needed was a Gemfile and a config.ru. For a
node.js application built with Express, I used a package.json that included
the dependencies and a start script.
You can also optionally use a Heroku-style Procfile to specify how to start the app. Dokku is largely compatible with Heroku, so you can refer to the Heroku docs to see what you need to do for other programming language stacks.
In the source code for your application, you will need to specify the host and
port of the RethinkDB instance in the linked container. The RethinkDB Dokku
plugin exposes those through environment variables called RDB_HOST and
RDB_PORT. In my Ruby application, for example, I used the following code to
connect to the database:
DBHOST = ENV["RDB_HOST"] || "localhost"
DBPORT = ENV["RDB_PORT"] || 28015

conn = r.connect :host => DBHOST, :port => DBPORT
...
After you finish configuring your application so that it will run in Dokku, be sure to commit your changes to your local git repository. To deploy the application, you will need to create a new remote:
$ git remote add dokku dokku@apps.mydomain.com:myapp
In the example above, use the domain or IP address of the droplet. Replace the
word myapp with the name of your application. The name should match the one
that you used when you created the RethinkDB container earlier.
Deploy your application
When you are ready to deploy the application, simply push to dokku:
$ git push dokku master
When you push the application, Dokku will automatically create a new container
for it on the droplet, install the necessary dependencies, and start running
the application. After the deployment process is complete, you will see the
address in your output. If you used an IP address, it will just be the IP and
port. If you used a domain, it will be a subdomain like
myapp.apps.mydomain.com. Visit the site in a web browser to see if it worked
correctly.
If your application didn’t start correctly, you can log into the droplet to troubleshoot. Use the following command to see the logs emitted by the deploy process:
$ dokku logs myapp
Replace myapp with the name that you used for your application. That command
will show you the log output, which should help you determine if there were any
errors. If you want to delete the deployed application, perform the following
command:
$ dokku delete myapp
You can type dokku help to see the full list of available commands. I also
recommend looking at the advanced usage examples for the RethinkDB Dokku
plugin to learn about other capabilities that it provides. You can, for
example, expose the web console for a specific containerized RethinkDB instance
through a public port on the host.
Although the initial setup process is a little bit involved, Dokku makes it extremely easy to deploy and run your RethinkDB applications. Be sure to check out our example projects if you are looking for a sample RethinkDB application to try deploying with Dokku.
For additional information about using Dokku with RethinkDB, check out:
- The official Dokku documentation
- The Dokku RethinkDB plugin by Stuart Bentley
- Digital Ocean’s Dokku tutorial series