BeerThink: infinite scrolling in a mobile app with Ionic, Node.js, and RethinkDB
 Ryan Paul
Developers often use pagination to display large collections of data. An application can fetch content in batches as needed, presenting a fixed number of records at a time. On the frontend, paginated user interfaces typically provide something like “next” and “previous” navigation buttons so that users can move through the data set. In modern mobile apps, it is increasingly common to implement an infinite scrolling user interface on top of paginated data. As the user scrolls through a list, the application fetches and appends new records.
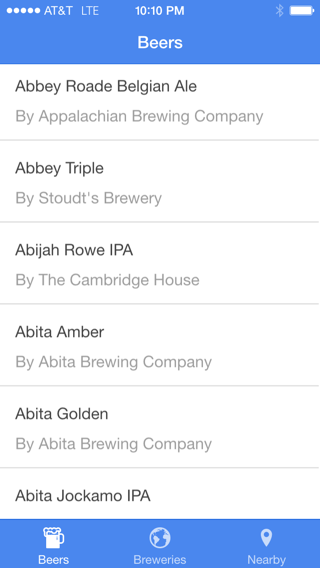
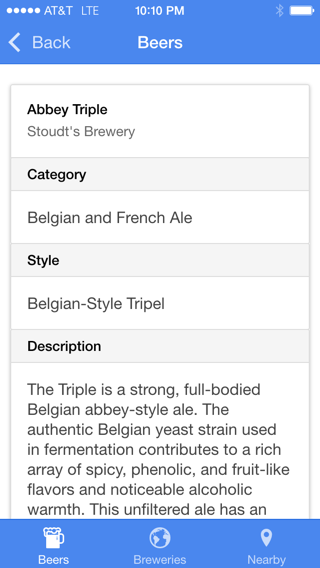
To demonstrate the use of pagination in RethinkDB applications, I made a simple mobile app called BeerThink. It displays a list of beers and breweries, providing a detailed summary when the user taps an item. The app uses a data dump from the Open Beer Database, which contains information about roughly 4,400 beers and 1,200 breweries. I converted the data to JSON so that it is easy to import into RethinkDB. There are two tables, one for beers and one for breweries. The application uses RethinkDB’s support for table joins to correlate the beers with their respective breweries.
BeerThink’s backend is built with Node.js and Express. It exposes beer and brewery data retrieved from a RethinkDB database, providing a paginated API that returns 50 records at a time.
The BeerThink frontend is built with Ionic, a popular AngularJS-based JavaScript framework designed for mobile web apps. BeerThink uses an infinite scrolling list to present the beers in alphabetical order.
BeerThink’s architecture aligns with the API-first approach used by many modern mobile web applications. The backend is solely an API layer, completely decoupled from the frontend. The frontend is a single-page web application designed to consumes the backend API. This particular approach makes it easy to build multiple frontend experiences on top of the same backend. You could, for example, easily make native desktop and mobile applications that consume the same backend API.
This tutorial demonstrates how BeerThink’s pagination works at each layer of the stack: the RethinkDB database, the Node backend, and the Ionic client application.
Efficient pagination in RethinkDB
If you’d like to follow along and try the pagination queries yourself, create a
table and then use the r.http command to add the beer list to a database:
r.table("beers").insert(r.http("https://raw.githubusercontent.com/rethinkdb/beerthink/master/data/beers.json", {result_format: "json"}))
To efficiently alphabetize and paginate the beer list, you first need to create an index on the name property:
r.table("beers").indexCreate("name")
After creating the index, you can use it in the orderBy command to fetch an
alphabetized list of names:
r.table("beers").orderBy({index: "name"})
When paginating records from a database, you want to be able to obtain a subset
of ordered table records. In a conventional SQL environment, you might
accomplish that by using OFFSET and LIMIT. RethinkDB’s skip and limit
commands are serviceable equivalents, but the skip command doesn’t offer
optimal performance.
The between command, which is commonly used to fetch all documents that are
between two keys in a table, is a much more efficient way to get the start
position of a table subset. You can optionally specify a secondary index when
using the between command, which means that it can operate on the indexed
name property of the beers table.
The following example shows how to use the between command on the name
index to get all of the beers between “Petrus Speciale” and “Plank Road Pale
Ale” in alphabetical order:
r.table("beers")
  .between("Petrus Speciale", "Plank Road Pale Ale", {index: "name"})
  .orderBy({index: "name"})
When the BeerThink application starts, it uses orderBy and limit to fetch
the first page of data. To get subsequent pages, it uses the between and
limit commands. The value that the program supplies for the between
command’s start position is simply the index of the very last item that was
fetched on the previous page.
r.table("beers")
  .between("Petrus Speciale", null, {leftBound: "open", index: "name"})
  .orderBy({index: "name"}).limit(50)
The example above shows how to fetch 50 records, starting from a particular
beer. Because the program doesn’t actually know what beer will be at the end of
the new page of data, the between command is given null as its closing
index value. That will cause the between command to return everything from
the start index to the end of the table. The query uses the limit command to
get only the desired number of records.
Setting the value of the leftBound option to open tells the between
command to omit the first record, the one that we use to define the start
index. That’s useful because the item is one that you already have at the end
of your list—you don’t want to add it again.
The slice command
The between command is a good way to implement pagination in many cases, but
it isn’t universally applicable. There are cases where you won’t have the last
item of the previous page to use as a starting point.
Consider a situation where you want the user to be able to visit an arbitrary
page without first iterating through the entire set. You might, for example,
want to build a web application that accepts an arbitrary page number as a URL
path segment and returns the relevant results. In such cases, the best approach
is to use the slice command.
The slice command takes a start index and an end index. To get 50 records that
are 3000 records down from the top of the table, simply pass 3000 and 3050
as the parameters:
r.table("beers").orderBy({index: "name"}).slice(3000, 3050)
When the user requests an arbitrary page, you simply multiply by the number of items per page to determine the slice command’s start and end positions:
query.slice((pageNumber - 1) * perPage, pageNumber * perPage)
In the example above, use the desired values for pageNumber and perPage.
Although the slice command isn’t as fast as using between and limit, it
is still much more efficient than using the skip command.
Pagination in BeerThink’s API backend
The BeerThink backend is built with Node and Express. It provides simple API
endpoints that are consumed by the frontend client application. The /beers
endpoint provides the list of beers, 50 records at a time. The application
also has a /breweries endpoint that similarly displays a list of beers.
For pagination, the user can optionally pass a last URL query parameter with
the name of the most recently-fetched item. Both API endpoints support the same
pagination mechanism. Taking advantage of the ReQL query language’s
composability, I generalized the operation that I use for pagination into a
function that I can apply to any table index:
function paginate(table, index, limit, last) {
  return (!last ? table : table
    .between(last, null, {leftBound: "open", index: index}))
  .orderBy({index: index}).limit(limit)
}
The table parameter takes a RethinkDB expression that references a table. The
index parameter is the name of the table index on which to operate. The
limit parameter is the total number of desired items. The last parameter is
the item to use to find the start of the page. If the last parameter is null
or undefined, the application will fetch the first page of data instead of
applying the between command.
In the /breweries endpoint, apply the paginate function to the breweries
table. Use the req.param method provided by Express to get the URL query
parameter that has the value of the last list item. If the user didn’t provide
the URL query parameter, the value will be undefined. All you have to do is run
the query and give the user the JSON results:
app.get("/breweries", function(req, res) {
  var last = req.param("last");

  paginate(r.table("breweries"), "name", 50, last).run(req.db)
  .then(function(cursor) { return cursor.toArray(); })
  .then(function(output) { res.json(output); })
  .error(function(err) {
    res.status(500).json({error: err});
  });
});
The /beers endpoint is implemented the exact same way as the /breweries
endpoint, using the same paginate function that I defined above. The query is
a little more complex, however, because it has to use an eqJoin operation to
get the brewery for each beer:
app.get("/beers", function(req, res) {
  var last = req.param("last");

  paginate(r.table("beers"), "name", 50, last)
    .eqJoin("brewery_id", r.table("breweries"))
    .map(function(item) {
      return item("left").merge({"brewery": item("right")})
    }).without("brewery_id").run(req.db)
  .then(function(cursor) { return cursor.toArray(); })
  .then(function(output) { res.json(output); })
  .error(function(err) {
    res.status(500).json({error: err});
  });
});
Even though the two endpoints used different queries, the same pagination
function worked well on both. Abstracting common ReQL patterns into reusable
functions can greatly simplify your code. If you wanted to make it possible for
the client specify how many records are returned for each page, you could
easily achieve that by taking another request variable and passing it to the
paginate function as the value of the limit parameter.
Slice-style pagination on the backend
Although the between command is the best approach to use for pagination in
the BeerThink application, the slice command is also easy to implement on the
backend. I’ve included a brief explanation here for those who would like to see
an example.
When you define a URL handler in Express, you can use a colon to signify that a
particular URL segment is a variable. If you define the breweries endpoint as
/breweries/:page, the page number passed by the user in the URL segment will
be assigned to the request’s page parameter.
In the handler for the endpoint, use parseInt or a plus sign to coerce the
page number into an integer that can be passed into the ReQL query. Next, use
the orderBy command to alphabetize the breweries. Finally, use the slice
command with the page number and item count to fetch the desired subset of
items.
app.get("/breweries/:page", function(req, res) {
  var pageNum = parseInt(req.params.page) || 1;

  r.table("breweries").orderBy({index: "name"})
    .slice((pageNum - 1) * 50, pageNum * 50).run(req.db)
  .then(function(cursor) { return cursor.toArray(); })
  .then(function(output) { res.json(output); })
  .error(function(err) {
    res.status(500).json({error: err});
  });
});
If the user browses to /breweries/3, the application will give them the third
page of brewery data formatted in JSON. In the example above, you might notice
that the code assigns a default value of 1 to the pageNum variable if a
page number wasn’t provided with the request. That makes it so visiting
/breweries by itself, without a page URL segment, will return the first page
of data.
Consuming the paginated API in Ionic
Now that the endpoint is defined, the client can simply iterate through the
pages as the user scrolls, adding each page of data to a continuous list. It’s
especially easy to accomplish with Ionic, because the framework includes an
AngularJS directive called ion-infinite-scroll that you can use alongside any
list view to easily implement infinite scrolling:
<ion-content>
  <ion-list>
    <ion-item collection-repeat="beer in items" ...>
      ...
    </ion-item>
  </ion-list>

  <ion-infinite-scroll on-infinite="fetchMore()" distance="25%">
  </ion-infinite-scroll>
</ion-content>
In the markup above, the framework will execute the code in the on-infinite
attribute whenever the user scrolls to the position described in the distance
attribute. In this case, the application will call the fetchMore method on
the active scope whenever the user scrolls within 25% of the list’s bottom.
In the associated AngularJS controller, the fetchMore method uses the $http
service to retrieve the next page of data. It passes the name property of the
most recently-fetched list item as the last URL query parameter, telling the
backend which page to return.
app.controller("ListController", function($scope, $http) {
  $scope.items = [];
  var end = false;

  $scope.fetchMore = function() {
    if (end) return;

    var count = $scope.items.length;
    var params = count ? {"last": $scope.items[count-1].name} : {}

    $http.get("/beers", {params: params}).success(function(items) {
      if (items.length)
        Array.prototype.push.apply($scope.items, items);
      else end = true;
    }).error(function(err) {
      console.log("Failed to download list items:", err);
      end = true;
    }).finally(function() {
      $scope.$broadcast("scroll.infiniteScrollComplete");
    });
  };
});
Each time that the fetchMore function retrieves data, it appends the new
records to the items scope variable. If the backend returns no data, the
application assumes that it has reached the end of the list and will stop
fetching additional pages. Similarly, it will stop fetching if it encounters an
error. In a real-world application, you might want to handle errors more
gracefully and make it so that the user can force a retry.
The ion-item element in the HTML markup is bound to the items array, which
means that new records will automatically display in the list. When I first
built the application, I originally implemented the repeating list item with
Angular’s ng-repeat directive. I soon discovered that ng-repeat doesn’t
scale very well to lists with thousands of items—scrolling performance wasn’t
very good and switching back from the beer detail view was positively glacial.
I eventually switched to Ionic’s relatively new
collection-repeat
directive, which is modeled after the cell reuse techniques that found in
native mobile frameworks. Adopting collection-repeat substantially improved
scrolling performance and eliminated detail view lag. If you are building
mobile web apps with infinite scrolling lists that will house thousands of
items, I highly recommend collection-repeat.
Going further
The application has a number of other features that are beyond the scope of this article, but you can get the source code from GitHub and have a look if you would like to learn more.
Install RethinkDB and check out the 10-minute intro guide to start building your first project.